

Costume in a sentence: Cardboard armor is free if you own a knife and glue: line the box flutes up with the length of each curve, score the inside before you bend, glue two layers with crossed flutes where it must stay stiff, skin it in glued paper, then paint it silver. Keep it dry, because damp board loses strength.
Cardboard armor turns the boxes stacked by your door into a chest plate, bracers, greaves and a simple helmet. Below: which boxes to keep, how to bend board without cracking it, how to stiffen, seal and paint it, a wear test, and cardboard against EVA foam, priced today.

Cardboard armor at a glance
Four pieces cover most cardboard armor looks: a chest plate, a pair of bracers, a pair of greaves and a helmet band. Each one has a different bending job, so each wants the flutes running a different way. Plan one evening per piece.
| Piece | Main shape | Flutes run | Layers | Done when |
|---|---|---|---|---|
| Chest plate | Wide curve plus a center ridge | Up and down the body | 2, crossed, on the front panel | You can hug yourself in it without the sides buckling |
| Bracers (forearms) | A cone, wider at the elbow | Along the arm, with diagonal scores | 1 plus a paper skin | It slides over your hand with a glove on |
| Greaves (shins) | A half tube with a knee cap | Along the leg | 1, with a doubled front strip | You can climb a flight of stairs |
| Helmet band | A cylinder with a face opening | Up and down | 1 plus a brow strip | You can turn your head and see your feet |
No swords or shields here, only pieces you wear. Short on time? Build the bracers first.
Which boxes make the best cardboard armor?
Plain single-wall shipping boxes with C or B flutes make the best cardboard armor: thick enough to hold a curve, thin enough to score by hand. Skip wet or waxed boxes, and save the largest flat panels for the chest plate, since joins mid-curve fail first.
Corrugated board is a wavy fluted sheet glued between flat liners, and it is anisotropic, meaning its stiffness changes with direction, according to Wikipedia’s corrugated fiberboard entry. Measure the cut edge of a box to find its flute size.
| Flute | Thickness | Where you find it | Armor use |
|---|---|---|---|
| A | 4.8 mm (3/16 in) | Some heavy cartons | Stiff flat plates; hard to roll tight |
| C | 4.0 mm (5/32 in) | The most common shipping box | Chest plate and greaves |
| B | 3.2 mm (1/8 in) | Smaller boxes and some cases | Bracers, helmet band, trim |
| E | 1.6 mm (1/16 in) | Mailers and retail boxes | Raised detail strips and rivet plates |
The rule that makes everything easier: board rolls easily when the flutes run parallel to the bend, like the length of a tube, and fights you when they cross it. Mark an arrow on every panel showing flute direction before you cut.
How do you score and bend cardboard into curves?
Press a line into the inside face with a blunt tool, such as a pen cap or a butter knife against a metal ruler, then fold along it. For a soft curve, score many parallel lines a finger width apart. For a sharp ridge, cut through the top liner only. Never cut through all three layers on a bend line.
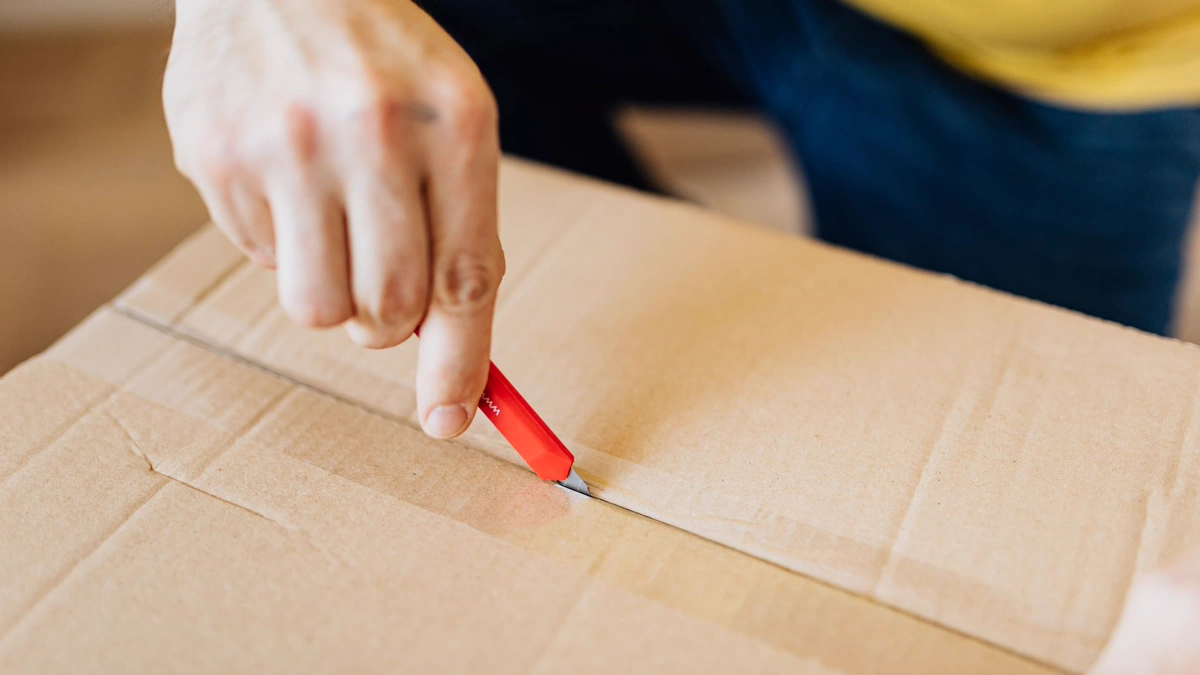
Four moves cover nearly every piece of cardboard armor:
- Pressed score: drag a blunt point firmly along a ruler on the inside face. Best for rolling curves; the outer liner stays smooth.
- Cut score: slice through the top liner only, or through the liner and flutes while leaving the back liner whole. Best for crisp ridges like a chest plate center line.
- Darts: where a panel must cup, like a knee cap, cut a narrow wedge, close it and glue a tab behind.
- Diagonal scores: angled lines let a strip roll into a cone, the bracer shape.
The makers who tried it first back this up. In a well-known Instructables cardboard armor build made for a cardboard tube tournament, the maker scored the inside with a pen cap and a metal ruler, cut darts so the chest shaped around the body, and used diagonal scores to cone the forearm pieces. They also forgot a glue tab on one bracer and had to start over. On Reddit, someone who made a first cardboard helmet found tape and scissors frustrating and wanted a glue gun and box cutter next time; a reply suggested scoring a long line, then repeated light passes until the board gives.
How do you draw a cardboard armor template from your own measurements?
Measure the body part, draw the flat shape on paper, tape the paper to yourself to check the fit, then trace it onto cardboard with an extra 2 cm (about 3/4 in) glue tab on every join. A paper test saves a whole panel when the first shape is wrong.
A free printable cardboard armor template fits the person it was drawn for. Your measurements fit you. Take these with a soft tape:
- Chest plate: width across the chest from armpit to armpit, shoulder to waist length, waist to the base of the neck, and half the waist measurement plus a little ease.
- Bracers: wrist and forearm circumference plus about 2 cm, and wrist to just below the elbow.
- Greaves: ankle and calf circumference, and ankle to the bottom of the kneecap.
- Helmet band: head circumference at the forehead, plus 2 to 3 inches for ease and overlap.
The Instructables maker above drafted the chest from body measurements like a dressmaker drafts a bodice, and built a paper model of the shoulder pieces before cutting board. That paper step is the cheapest insurance in any DIY cardboard armor build.
How to make cardboard armor piece by piece
Build the bracers first, then the greaves, then the chest plate, and finish with the helmet band. That order runs from small cones to large curves, so every mistake happens on a cheap piece.
- Bracers. Cut a long trapezoid, wide end at the elbow, score diagonal lines every 1.5 cm inside, roll it into a cone and glue the tab. Edge each opening with a thin strip. Test it with a glove on: the Instructables maker’s wrists chafed on bare edges, and gloves fixed it.
- Greaves. Cut a half tube for the front of the shin and glue a second strip down the front as a ridge. Make the knee cap a separate small dome with two darts, hinged with fabric so it moves.
- Chest plate. Trace the front panel from your template, cut the center ridge as a cut score, close the bust or rib darts, and glue a second layer over the front with its flutes crossing the first. Join front and back at the shoulders with straps, not glue.
- Helmet band. Score a strip with close vertical lines, roll it into a ring, glue it at the back and add a brow strip. Cut the face opening small with the helmet off, then enlarge it. Keep the top open or add a six-panel crown.
Straps are where wearability is won. House of Pixel Dust, who made a cardboard knight costume for her son from boxes already in the house, tied the chest plate at the sides with strips of thick fabric that untie for getting in and out. Elastic, ties or hook-and-loop tape all beat glue.
How do you make cardboard armor strong enough to wear?
Glue two layers with flutes crossed wherever a piece must stay rigid, keep joins out of the middle of curves, and edge everything with a glued strip. Curves add strength too, so a well-bent single layer often beats a flat double one.
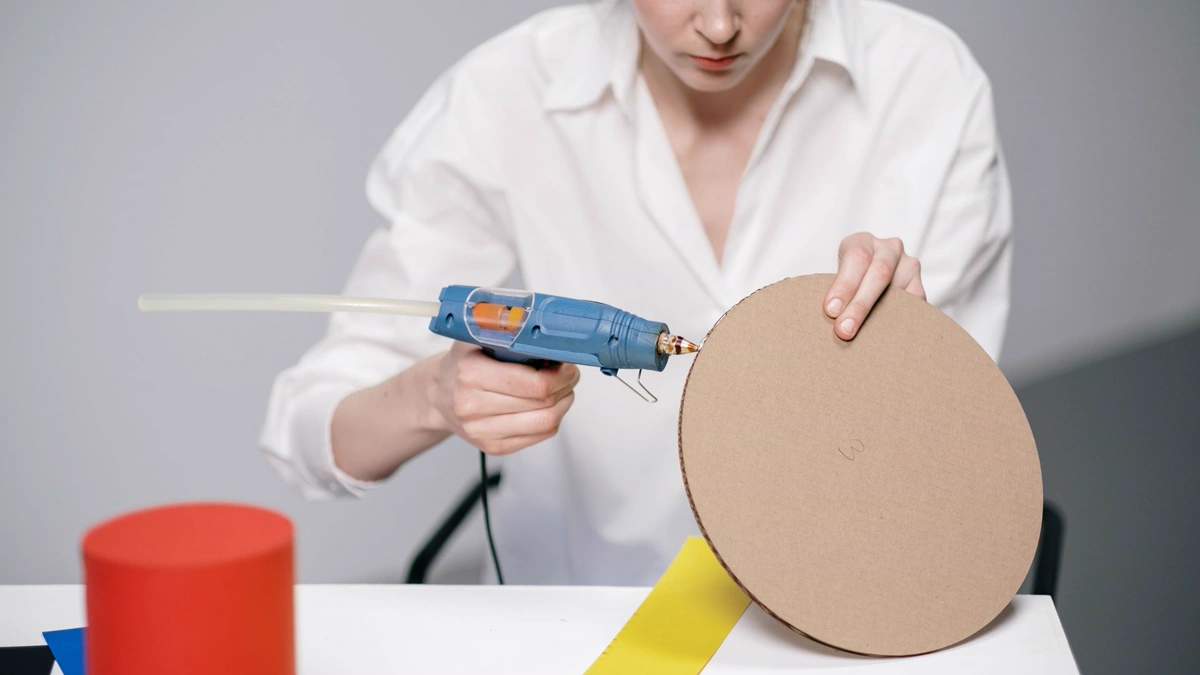
Glue choice changes the build more than board does:
| Glue | Sets in | Good for | Watch out for |
|---|---|---|---|
| Hot glue | Seconds, as it cools | Tabs, darts, strap anchors, anything you hold by hand | Burns on fingers; lumps show through paint |
| White PVA glue | Slow, needs weight or clamps | Laminating two flat layers, paper skins | Too much water warps the board |
| Glue and water, about 1 to 1 | Hours; dry fully between coats | Brushing over paper skins for a hard shell | Several thin coats beat one wet one |
Builders say the same. In a Reddit thread of cardboard armor tips, one reply said to watch flute direction and glue two pieces with the grain running different ways wherever a section must stay rigid, using white glue weighted while it set. Another hot glued the joins, covered the armor in brown paper bags and brushed on roughly equal parts glue and water over several coats, which stiffened it and doubled as a primer.
Double the board where straps pull, and round corners; square ones peel first.
How do you seal and paint cardboard armor to look like metal?
Skin the board in glued paper or thin coats of glue and water, let it dry fully, add a dark base coat, then dry-brush silver and rub a dark wash into the recesses. Thin coats matter more than brand, because water is what warps cardboard.
That has a number behind it: corrugated board normally holds 6.5 to 9.5% moisture, and above that its compression strength drops, according to Wikipedia’s corrugated fiberboard entry. In the same Reddit thread, a builder said heavy paint made a poster-board skin bubble a little.
- Skin: paste palm-sized pieces of brown paper over seams and edges with glue and water to hide corrugation lines.
- Seal: decoupage medium is not waterproof. A decoupage blog that answers this exact question calls even the regular formula only somewhat water resistant. Treat it as a smoothing coat, not rain protection.
- Base: one thin coat of black or dark gray acrylic so the silver reads as metal, not foil.
- Metal: dry-brush silver over the base, heaviest on edges and ridges where real metal would catch light. House of Pixel Dust needed at least two coats of silver spray paint for full coverage.
- Grime: brush thinned dark paint into seams and wipe the high points clean. Punched paper dots make rivets.
Spray paint needs open air; brushed acrylic suits a kitchen table. Duct tape is the other route: a college student’s cardboard knight costume on Instructables was wrapped in silver tape, and covering it was the longest step, sometimes doubling the build time.
Does cardboard armor survive bending, sitting and rain?
Well-built cardboard armor survives bending and sitting if the joints are hinged, not glued solid, but it does not survive real rain. Run three checks at home a week before the event: a bend test, a sit-and-stairs test and a spray-bottle rain test. Each has a clear pass mark.
This is a checklist for your build, drawn from what the makers above ran into, not a test we ran.
| Test | How to run it | Pass mark | Usual fix |
|---|---|---|---|
| Bend | Raise both arms overhead, hug yourself, touch your toes, ten times each | No tab pops, no crease appears in a curve | Trim the armholes, hinge shoulder pieces with fabric |
| Sit and stairs | Sit on a low chair for five minutes, stand without hands, climb one flight | Greaves and chest plate stay put and nothing digs in | Shorten the chest plate, split greaves at the knee |
| Rain | Mist one scrap panel finished like your armor with a spray bottle for one minute, wait ten | No softening when pressed, no lifting paper | More sealer coats, and carry a clear poncho anyway |
| Edges | Wear the bracers and helmet for half an hour | No red marks at wrists, neck or forehead | Glue felt or fabric tape along the inside edges |
Stairs catch more people than rain. A commenter under the Instructables cardboard armor guide found walking up stairs in full leg armor difficult and planned better articulation. The guide’s maker trimmed about an inch from each armhole before they could bring their arms together, and needed a helper to get in. Plan a friend for the first fitting.
Cardboard armor vs EVA foam: which should you build?
Choose cardboard armor when money and time are tight and the event is indoors; choose EVA foam when the costume must survive rain, crowds and more than one season. Cardboard costs close to nothing and builds in a few evenings; foam costs about $50 in starter supplies but bends back instead of creasing.
EVA foam is a closed-cell material popular in cosplay for its ease of use and comfort, according to Wikipedia. Prices were read at Michaels and Harbor Freight on October 1, 2026; your store may differ.
| Factor | Cardboard armor | EVA foam armor |
|---|---|---|
| Main material | Used boxes from deliveries, $0 | $12.99 for a 24 x 60 in roll of 4 mm foam (Michaels) |
| Starter tools if you own nothing | About $15.75: $4.49 utility knife, $3.79 mini glue gun, $2.49 glue sticks and $1.99 white glue (smallest sizes), $2.99 metallic acrylic (Michaels) | About $50.45: foam roll, $9.99 contact cement (3 oz), $19.99 heat gun (Harbor Freight), $4.49 knife, $2.99 paint; sealer extra |
| Weight per square meter | About 470 g per layer (FEFCO industry average), so roughly 940 g for a crossed double layer | About 340 g for 4 mm sheet listed at 85 kg/m3 density |
| Build time, set of four pieces | Two to four evenings | Longer; contact cement needs about 5 minutes to get tacky per joint, plus heat shaping |
| Durability | Creases permanently when bent too far; one event, maybe two | Flexes and springs back; several seasons with care |
| Water | Weakens when damp, even sealed | Closed cells resist water far better |
The weight row surprises people. Board averages 469 to 497 g per square meter according to FEFCO’s corrugated board production data, so doubling it for stiffness outweighs the same area of dense foam. The contact cement timing comes from Cosplay Advice’s foam bracer tutorial. If foam wins, our EVA foam cosplay guide covers cutting, heat shaping and sealing. Or test-fit in cardboard, then cut the final set in foam from the same templates.
By the numbers
- 4.0 mm is the thickness of C flute, the most common box board, per Wikipedia.
- 6.5 to 9.5% is the normal moisture range of corrugated board; above it, compression strength drops.
- About $15.75 buys a knife, mini glue gun, sticks, white glue and metallic paint at Michaels; with tools at home, cardboard armor is free.
- About $50.45 buys the comparable EVA foam starter set: foam roll, contact cement, heat gun, knife and paint, before sealer.
Remy’s verdict on cardboard armor
Build it. Cardboard armor is the best first armor project going: drafting, scoring curves and painting metal all carry straight over to foam, and the material is free. A cardboard knight costume of four well-fitted pieces reads better across a room than a full suit that cannot bend at the knee.
The weak spot is weather. Cardboard armor is an indoor, one-season costume, so plan a poncho and a dry bag, and build the bracers first to learn the moves cheaply. New to costumes altogether? Start with our four-week cosplay for beginners plan, then browse more first builds in the beginner cosplay section.
Stuck mid-build?
Quick answers for when the glue gun is warm, the boxes are flat and one piece of the build refuses to behave.
How long does cardboard armor take to make?
Plan one evening per piece, so two to four evenings for a set, plus drying time for glue and paint. Wrapping in tape instead of painting can double the finishing time.
Can kids help build cardboard armor?
Yes, with an adult on the knife and glue gun. Kids can trace templates, paste paper skins and paint. Keep blades and hot glue on a clear table out of reach.
How do you strap cardboard armor to your body?
Glue elastic, fabric ties or hook-and-loop tape to doubled cardboard tabs, and join the chest plate with straps, not glue, so it comes off. A fitted shirt underneath stops rubbing.
Can you wear cardboard armor to a convention?
Usually, since cardboard armor is clothing, not a prop. Read the event’s posted prop policy anyway, keep pieces narrow for crowded aisles, and pack tape for repairs.
How do you store cardboard armor after the event?
Keep it dry, nested piece inside piece, never in a damp garage or basement. Patch dents with a paper skin and paint. For a costume that lasts years, use the pieces as templates and rebuild in foam.
How we researched this: Materials list and order of steps come from the Instructables builds, House of Pixel Dust and the Reddit threads cited below; board data from Wikipedia and FEFCO; prices from Michaels and Harbor Freight pages read October 1, 2026. The wear test is a checklist for you to run, not a test we ran. The first pass came from an AI tool and was rewritten step by step.
Sources: Wikipedia: Corrugated fiberboard, Wikipedia: Ethylene-vinyl acetate, FEFCO corrugated board production, Michaels product pages for a mini glue gun and an EVA foam roll, Harbor Freight heat gun listing, a decoupage blog on water resistance, Cosplay Advice, plus first-hand builds on Instructables (tube tournament armor), Instructables (knight costume), House of Pixel Dust and two Reddit threads (r/cardboard, r/ArmsandArmor).